
This website is supported by its readers. If you click one of my links I may earn a commission. I am also a participant in the Amazon affiliates programme and I will also earn a commission from qualified purchases.
So if you’re anything like me, staring at a blank home office when you’re working from home can wear you down. I mean a little bit of greenery can go a long way when designing a home office with studies showing an increase in mood, productivity and focus, all of which are super important for remote workers.
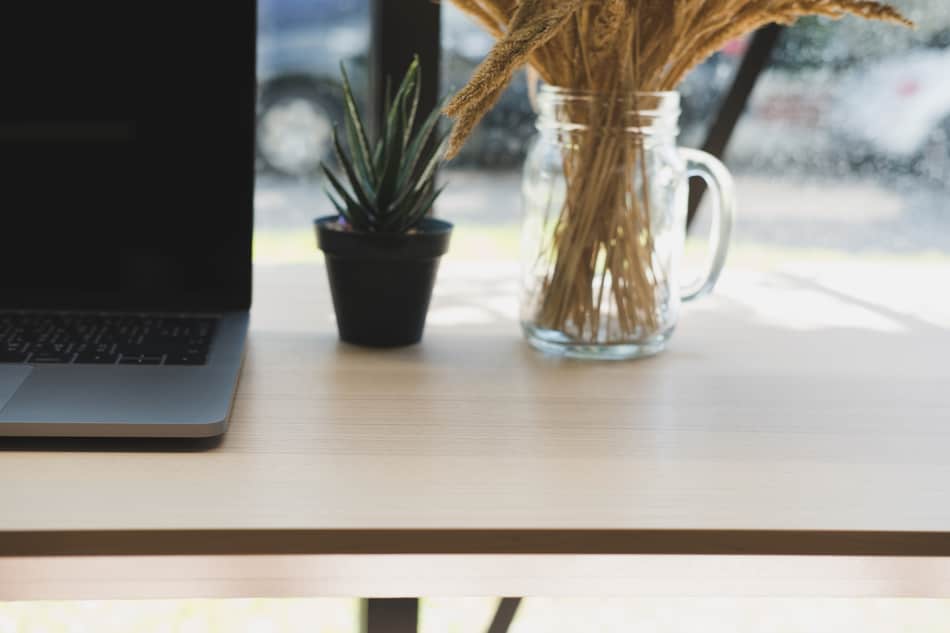
One way to avoid breaking the bank when it comes to greenery is designing your own plant pots. This will help you stay in full creative control and make your designs fit seamlessly into your office.
So how exactly do you make plant pots for a home office? Are there any steps that are the same regardless of your design? Keep reading to find out more.
(Just a heads up a lot of people reading my blog are in the process of designing their own home office. If you want to save some of the painstaking time I did in designing my office, you can find my recommended products here)
Figure out how much time you have
So before you even start to think of your design, the first thing you need to get an idea of is how much time you have to make your plants.
Us remote workers are often guilty of spending too much time in our offices and so the more intricate your design the more time it will take to create.
Instead, figure out exactly how much time you can spend on this project and then work backward.
If your need for plant pots is urgent then figure out how many hours of craftwork this will take and then take this from there.
So what are the averages when it comes to creating plant pots? Well, I go into a bit more detail on the design section below but depending on the material it might take longer, to help, I’ve developed a table below.
| Plant pot material | Time taken to complete |
| Paper | One hour |
| Soap bottle | Less than 30 mins |
| Coke bottle | Less than 30 mins |
| Bleach Bottle | Two hours |
| Tin Cans | Less than 30 mins |
| Glass Jar | 8+ hours |
| Lightbulb | 8+ hours |
Now bear in mind this is only for the bare minimum basic plant pot, if you decide to add design or paint to your pots this will add more time to your design.
Select the right materials
So now you have an idea of how long it will take to design your plant pot. It’s time to start thinking of some ideas for what you want to make them out of.
Plant pots are definitely the easiest route, however, you’re reading this because you want to go DIY mode and create them yourself.
So what are some materials that are good for making homemade plant pots for a home office? We’ve covered some of them above but I would recommend the following:
- Glass Jars
- Light Bulbs ( complicated but worth it)
- Disposable soap bottles
- Tin Cans
- Teapots
- teacups
- Bleach/detergent bottles
- Newspaper
- Toilet roll
- Plastic boxes
- Chocolate tins
- Unused paper bins
- Fizzy Drink bottles
- Fruit containers (like grape boxes)
The best thing about all of these items is they can easily be found lying around your house and so will definitely be more inexpensive than buying these items fresh.
Make sure the items are suitable for indoors
This is a pretty obvious one but I’m not afraid to admit I made this mistake before.
All of the above items mentioned should be fine when making plant pots however if you decide to use other items that you have double-checked they are safe to be used inside.
Sometimes things like old barrels or car parts might seem like the perfect items to use to fit larger plants in your home office however sometimes these might not be safe so be sure to double-check before you use them.
Wash your items out thoroughly
Again, this point is a bit of a given but not washing your items out thoroughly can potentially kill your plants.
If you’re using things like bleach bottles you don’t want any residual ingredients to kill the roots of your plant so be sure to wash your items out thoroughly or even let them set for a few days for certain items.
Now if you are using something like cardboard or paper to design your plant pots then be sure to give them a light wipe down without any water or else you will have a mess on your hands.
Decide what plant you want to put in your office
So you’ve come up with the item you want your plant pot to be made out of and cleaned it out thoroughly, now it’s time to fit arguably the most important part of your design in.
The actual plant itself.
Realistically this part is up to you when it comes to plants as only you know what will go well for your home office.
In my opinion, you can never go wrong with something like a fern or bonsai tree but to see my full list of recommendations for office plants you can check out my recommended plants for home offices here.
I’d also recommend having a look at bonsai trees – these are my personal favorite posts to have a look at if you are thinking of getting one:
- Are bonsai trees dog friendly
- How big do bonsai trees get
- Can you overwater bonsai
- Are bonsai trees hard to grow
- Can you plant a bonsai tree in the ground
- How to thicken bonsai branches
- Are bonsai trees poisonous
- How long do bonsai trees live
- What is sacrifice bonsai branch
Figure out how much light your plant needs
So now you have an idea of what plant you want to go for, it’s important to figure out how much light and water your plant needs.
This is important as it will impact your design.
For example, if your plant needs a lot of sunlight you will need to keep it near a window, if this is the case and you have a small home office you might need to go for a plant pot design that will be hanging next to your window so it can get the most amount of light.
As such this might require you to use things like string and baskets in your design.
On the other hand if your plant requires a lot of water, you might want to avoid any materials in your home office plant pot design that leaks water, so things like homemade paper and cardboard plant pots will be out of the mix.
These are all small things I forgot about when I first got my own office plants so trust me when I say it’s super easy for these to slip your mind.
Now it’s worth noting that a lot of people use outdoor garden pods to work from and also ensure their office plants get enough light., If you’re interested in learning more about this you can check out my blog post on it here or look at all the recommended products for it here.
Sketch out your design with sizes
The plant and materials have been selected, it’s time for the fun stuff!
Here we can let your imagination run wild as you come up with the design for your plant pot. A few good questions to ask yourself would be the following:
- Do you want your plant pot to be the center point of your home office?
- Will your plant pot be based on the floor or hanging?
- What color scheme will you go for and will it match your home office?
One thing it is also worth doing is to draft up your design with the actual measurements,so this will avoid any nasty surprises when you are down the road.
On your design I think it would be a good idea to list out all the equipment you need to.
This is less for the actual item for your plant pot but the building material, for example glue gun, carpet cutters, knives string if your pot is hanging.
If you’re as bad at drawing as I am, feel free to use a free online designer which can definitely take your design ideas to the next level.
Start crafting
And so now it is time to start crafting your masterpiece, the steps you take for this are going to be different depending your design but thy generally follow the same process
- Cut your main item (coke bottle, cardboard etc) into a plant pot like size
- Design and paint your item to match your home office setting
- Prepare any holes for water filtration or attach string if your time needs to hang
- Transfer your plant into it’s new home
- Move the plant pot to it’s designated space in your home office
Almost all plant pots follow these stages, but we will go into more detail on specific design ideas later.
Wear protective gear when cutting
If you are using materials that are more fiddly to use like glass jars or light bulbs you may need to use sharp items like carpet cutters or other blades if these items need to be cut.
I can’t stress this enough, make sure you take precautions when actually crafting your design.
Personally I would ensure you use thick gloves as well as some form of eye protection when working which should give you the right amount of flexibility you need to work while keeping you safe at the same time.
How to make plant pots for a home office
So what are some good home office plant pot ideas made out of DIY materials?
Pinterest has a wealth of ideas on it but I’ve pulled together some of my favourite ideas from across the web below too
Plastic bottle home office plant pot
Source: Backyard Crafts
Difficulty: 1/5
Materials used: 2 litre plastic bottle, paint, knife, plant and googly eyes
Instructions:
Rinse out the plastic bottle and paint your colour of choice, cut the plastic bottle in half, Carefully remove your plant from it’s existing pot and place into the bottom half of the water bottle ( the side with the base in it). Apply googly eyes( if that is your kind of thing)
Soap bottle home office plant pot
Source: Fabiosa
Difficulty: 3/5
Materials used: 1 disposable pump action soap dispenser, Carpet cutters, Twine
Instructions:
Remove the pump action from the soap dispenser, Using a carpet cutter or crafting blade,m cut a small sized hole into the body of the soap dispenser that will be large enough for your plant. Tie a length of twine around the top of the soap dispenser, where the dispenser used to be.
Carefully insert soil into the hole and place your plant. This one is great for drier plants like cactus that don’t need a lot of water.
Paper home office plant pot
Source: Crouton Crackerjacks
Difficulty: 3/5
Materials used: Newspaper
Instructions:
Fold one sheet of newspaper in half and then half again.
Open up the paper so you see the centreline and fold the bottom left corner to the centerline like your making a paper aeroplane. Then fold the top of the paper on the centreline and then once again over the two other folds.
Flip the paper over and then fold the two sides towards the centerline like a pair of doors, fold the lower third of the paper then to the centre edge that the previous folds have created, then fold this again so you are left with a triangle point.
Tuck the fold into the flap and then fold the pointy side on both sides. Then aim for your point to touch the left corner of the newspaper and give it a hard fold..
When you open up your box this should give it a solid box shape.
This is perfect for small seedlings or things like chillies if you fancy growing veggies in your home office too.
Detergent boxes office plant pot
Source: Magic Craft Works
Difficulty: 4/5
Materials used: Detergent box, scissors, milk bottle top, felt marker
Instructions:
Cut your detergent box in half, once done use a milk top to draw out semi-circles below the center cut. Cut around these to get a feather effect then do the same of the halfway cut on the detergent handle. This might prove difficult so use some craft knives or carpet cutters to help with this.
Now the edges along the halfway cut might be a little bit shaped so try to blunt them down into bumps instead of points.
Paint your detergent box as you would like and use a needle piercing holes in the bottom of the design, fill with soil and add your plant.
Make sure when putting this in your home office you use this with a box underneath it or you might get some water in it as well.
Benefits of having greenery in your office
So hopefully the post today has shown how with a little bit of effort, you don’t have to break the bank when designing your own home office plant pots.
Having a bit of greenery can have a lot of benefits for us remote workers which include:
- Better air quality and less carbon dioxide
- Better mental health due to feeling close to nature
- A stronger immune system with studies in Norway showing a significant increase in wellbeing
- A sense of empathy which can help in your personal life
So get crafting and start work on your own plant pots for your home office today.
Once again you can see my plant recommendations here. Finally a lot of people reading my blog want to know what products I recommend for a home office/remote working. You can find out my recommendations here and learn how I make money whilst working remotely on the side here.
The content on this on this site has been written by Fehed Nicass who has over a decades worth of experience in sales and has worked remotely for the past 2 years.